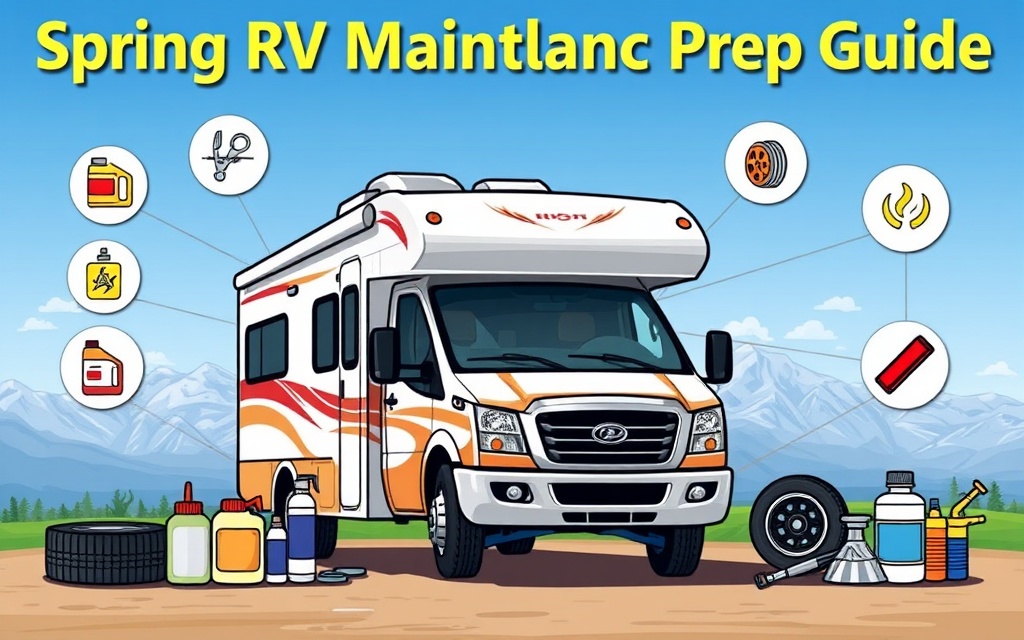
Every spring brings the promise of open roads and adventure—but arriving unprepared transforms that promise into a liability. Winter storage subjects your RV to extremes that few other assets endure: temperature swings that degrade seals, months of inactivity that allow critical systems to deteriorate, and environmental exposure that silently compromises structural integrity. Before your RV leaves the driveway this season, these five professional-grade maintenance checks ensure not just reliable performance, but your safety and that of your fellow travelers.
1. Inspect Tires Thoroughly
Your RV’s tires represent the only contact point between your 35–40 ton vehicle and the highway. They demand respect and professional attention before travel season begins.
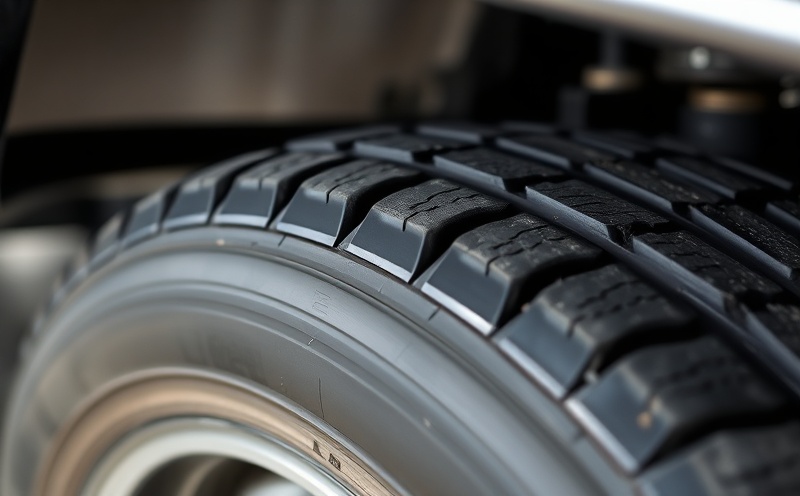
Winter storage is particularly harsh on RV tires. Months in cold, stationary conditions cause compounds to harden, pressure to drop dramatically, and flat spots to develop in the contact patches. Combined with UV degradation that accelerates sidewall cracking, winter-stored tires often look deceptively normal while becoming dangerously compromised. A tire failure at highway speed on a motorhome—carrying your family and thousands of pounds of cargo—isn’t a minor inconvenience. It’s catastrophic.
Here’s what a professional tire inspection covers:
- Tire pressure — Use a quality digital gauge (not the valve stem gauge that comes with many RVs). Check all tires cold, before driving, and account for seasonal temperature swings. Each 10°F drop in temperature reduces pressure by 1–2 PSI.
- Tread depth and wear patterns — The penny test is a starting point, not a standard. Professional highway travel demands 6/32" minimum, and uneven wear indicates alignment or suspension issues requiring specialist diagnosis.
- Sidewall condition — Inspect all four sides of every tire. Look for bulges, cracks, cuts, and weather checking. Small imperfections are early warnings of structural failure.
- Dry rot and aging — Tiny surface cracks that look cosmetic are actually the beginning of sidewall failure. UV exposure and oxygen breakdown rubber compounds regardless of tread depth.
RV tires degrade on a calendar, not mileage. Most manufacturers recommend replacement at five years, mandatory at ten. If your tires were installed more than five years ago—regardless of visible condition—replacement should happen before any spring travel. The cost of preventive replacement is a fraction of the cost of a roadside emergency or worse.
2. Check All Fluids
Liquids are the lifeblood of your RV. Engine oil lubricates at extreme pressures. Coolant prevents both boiling and freezing. Brake fluid transmits the force that stops a multi-ton vehicle. Transmission fluid provides both lubrication and hydraulic pressure for gear shifts. Each system operates at the edge of its specifications, and winter storage degrades all of them—moisture condenses, detergents break down, and seals harden.

A fluid inspection isn’t about checking levels. It’s about assessing the condition of each system. Discolored or contaminated fluid is your vehicle telling you that stress has exceeded tolerance. Listen.
- Engine oil and filter — Oil should be clear amber to light brown, never black. Months of storage allow sludge to settle and moisture to condense. If the oil is dark, an oil and filter change is mandatory before driving—old oil loses viscosity and protection at highway temperatures.
- Coolant condition — Bright green or orange is normal; brown or rusty coloring indicates internal corrosion. If the coolant has been in service for more than five years, a complete system flush and refill prevents cooling system failures and potential overheating on desert highways.
- Brake fluid inspection and testing — Brake fluid is hydroscopic—it absorbs moisture from the air over time. Moisture contamination reduces boiling point and compromises stopping power at sustained temperatures. If unchanged for 24+ months, professional brake system service including a complete fluid flush is essential.
- Transmission fluid analysis — Bright red or pink fluid is healthy. Brown or burned-smelling fluid indicates internal wear or overheating. Any color change demands specialist diagnosis before highway travel.
- Power steering fluid — Verify both level and color. A drop in level suggests a leak; discolored fluid indicates seal degradation or oxidation.
- Windshield washer systems — Fill with a winter-grade fluid rated for sub-zero temperatures, then test both front and rear spray systems. You'll need visibility in unexpected weather.
Your RV's braking system is non-negotiable. A brake failure on a 35–40 foot motorhome traveling at highway speed doesn't result in a controlled stop—it results in loss of vehicle control and potential catastrophic accident. If you have any doubt about brake system integrity, do not drive. Have a mobile RV specialist perform a professional inspection and complete brake system service before any spring travel begins. This is not an area for DIY shortcuts.
3. Inspect the Roof, Seals & Interior Moisture
Water damage is the silent destroyer of RVs. It works invisibly, spreading through roof seams and around sealants, migrating into wooden structures that become soft, dark, and expensive to repair. By the time you see visible mold or smell mustiness, structural damage is already advanced. Your inspection now prevents catastrophic damage later.
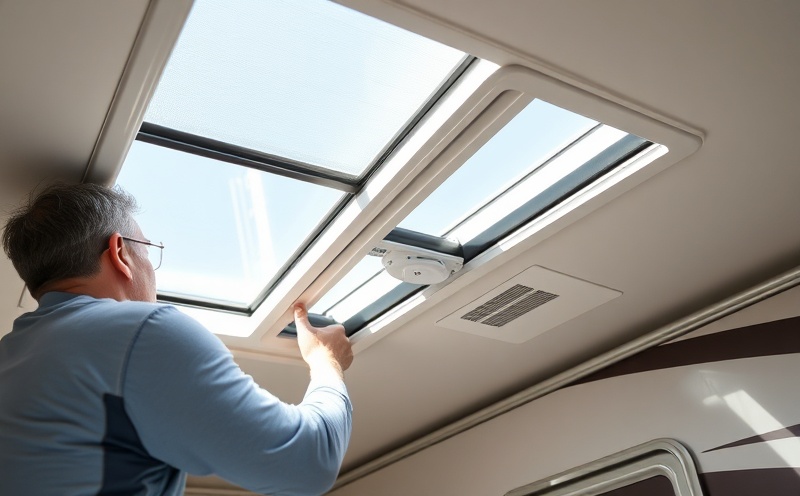
RV roofs endure extreme temperature swings—freezing at night, heating during the day. This stress causes sealant compounds to crack and separate. Combined with moisture from winter storage and spring rains, these tiny breaches become entry points for water that travels laterally through the roof structure, appearing inside cabinets or walls far from the original leak.
- Roof inspection walkthrough — Safely walk the entire roof in bright daylight. Inspect every seam, vent penetration, skylight edge, and trim joint. Look for cracks, peeling sealant, raised edges, or gaps where movement has separated materials. Winter freeze-thaw cycles create stress that appears as visible damage.
- Structural integrity assessment — Gently press on roof sections from inside (press from below), feeling for soft or spongy areas that indicate water has saturated the underlying plywood decking. Any soft spots mean professional roof repair is needed before travel.
- Interior moisture investigation — Open every cabinet and storage compartment. Look for water stains, discoloration, soft wood, or any mustiness that signals active or recent moisture. Spring storage often traps humidity—activation of your HVAC system should immediately improve air quality. Persistent odors indicate hidden mold growth.
- Window and door seal assessment — Inspect all window and door frames from outside. Look for water trails, mineral staining, condensation between panes, or fogging that indicates seal failure. Run your hand around seal perimeters feeling for gaps or separation.
- Climate control system activation — Run both heating and air conditioning systems independently for 15 minutes each. You're checking for functionality and—importantly—evaluating air quality and odor. The HVAC system will circulate any hidden moisture problems, making them apparent.
4. Test Braking & All Safety Systems
Your brakes represent the most critical safety system on your motorhome. Their failure doesn’t result in a gentle coast to a stop—it results in disaster. After months of storage, brake components may have experienced moisture intrusion, corrosion, or hydraulic pressure loss. Your testing now verifies that every component is ready for sustained highway braking demands.
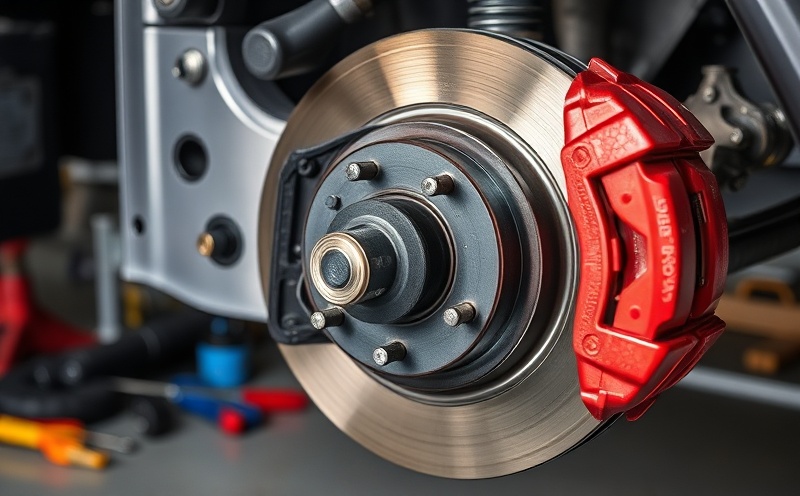
- Brake pedal firmness and response — Engine off, pump the pedal 5–6 times. The pedal should feel progressively firmer with each pump, and pressure should hold after the final pump. A soft or sinking pedal indicates air in the lines or hydraulic failure. Do not drive—have this serviced immediately.
- Brake noise investigation — Engine running, test the brakes from a slow roll in a safe area. Listen for any grinding, squealing, clicking, or unusual sounds. Squealing pads are normal (indicating pad wear indicators). Grinding suggests metal-to-metal contact, which means brake failure is imminent.
- Brake pad and rotor condition — Visually inspect pads through the wheel. Pads should measure at least 6/32" for safe highway operation; wear indicators should not be visible. Rotors should be smooth, not pitted or heavily scored.
- Exterior lighting systems — Test headlights (high and low beams), taillights, brake lights (have someone behind the RV to confirm), turn signals front and rear, and all marker lights. Any burned-out bulbs must be replaced before travel—you need visibility and visibility to others.
- Slide-out room operation — If your RV has slide-outs, operate each one fully extended and fully retracted. They should move smoothly with no jerking or binding. Confirm that seals compress evenly and fully when retracted—gaps indicate seal wear or structural misalignment.
- Visibility and communication systems — Inspect wiper blades for wear and test both front and rear washers. Confirm the horn sounds clear. Adjust and secure all mirrors, checking for cracks or loose mounts. Visibility and communication are safety fundamentals.
5. Professional Exterior Detail & Spring Protection
Winter storage doesn’t just sit on your RV—it degrades it. Road salt bonds to paint and oxidizes aluminum. Bird droppings and tree sap contain acids that etch clear coat. Mineral deposits from rain and minerals accumulate in streaks. Mold and mildew establish colonies on rubber seals. Month after month, these contaminants work beneath the surface, compromising the protective finishes that stand between your vehicle and the elements.
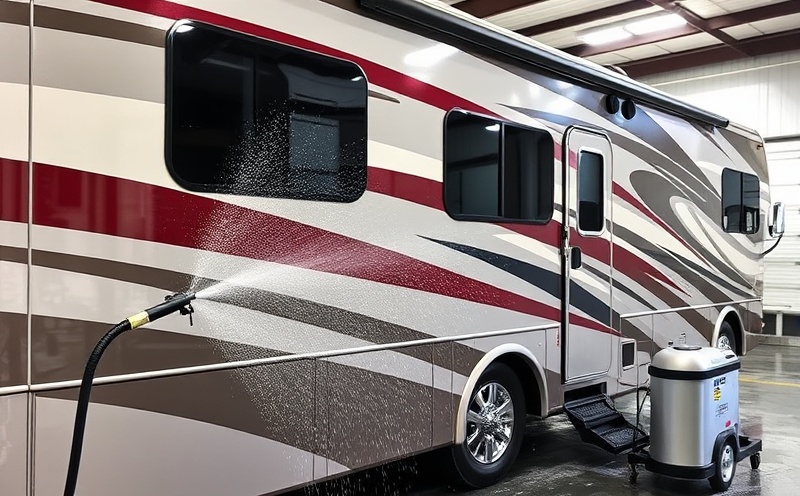
This is the moment when professional exterior service transforms prevention into investment. Not just cleaning, but protection—establishing a barrier that shields your RV for months of spring and summer travel.
- Professional mobile wash service — A mobile detailer comes to your location to thoroughly pressure-wash the exterior, removing winter accumulation, road salt, and contaminants. This is not a DIY power wash—professionals understand pressure settings safe for fiberglass, aluminum, and rubber components. $300–$500
- Wash with protective sealant application — The wash plus application of premium montan wax or ceramic spray sealant. This creates a hydrophobic barrier that repels water, reduces UV damage, and prevents oxidation throughout spring and summer. $500–$800
- Comprehensive spring detail package — Full exterior wash, paint protection, interior vacuum and wipe-down, window cleaning, and awning inspection. This is preventive maintenance that establishes professional-grade protection. $800–$1,200
Professional mobile detailing services come to your location—there's no need to drive a 40-foot motorhome across town. Expert detailers bring commercial-grade equipment and knowledge that DIY approaches cannot replicate. They understand RV-specific materials—fiberglass, aluminum, rubber seals—and know exactly how much pressure, heat, and chemical action each surface tolerates. Most importantly, they're trained to spot hidden damage. Winter grime masks problems that a professional eye catches immediately, allowing you to address issues before they become expensive failures.
Quick Reference Checklist
A professional spring maintenance routine typically takes 3–6 hours when handled comprehensively. The following table breaks down priority levels and service recommendations:
| Task | Priority | Time estimate | Service type |
|---|---|---|---|
| Tire inspection & pressure check | Critical | 30–45 min | DIY with professional assessment recommended |
| Fluid inspection & changes | Critical | 2–3 hrs | Professional recommended (brake system mandatory) |
| Roof & seal walkthrough | High | 1–1.5 hrs | DIY inspection with professional repair if needed |
| Brake system testing | Critical | 1–2 hrs | Professional specialist required |
| Exterior detail & protection | High | 3–5 hrs | Professional mobile service |
Professional Spring Preparation, Done Right
Spring is not the season for shortcuts. Your RV carries your family, your comfort, and your peace of mind onto the open road. Every mile depends on systems that you verified before departure. This is not about chasing perfection—it’s about eliminating surprises.
The five maintenance checks outlined above require knowledge, tools, and professional judgment that go beyond general vehicle maintenance. Your RV is specialized equipment. Its fluid systems, brake architecture, and structural integrity demand expert attention.
Eagle Star Detail specializes in comprehensive spring RV preparation for owners throughout the Eagle, Boise, and Meridian areas. Our mobile service comes to your driveway—your RV never needs to leave your property. We handle everything from professional exterior detail and paint protection to working with trusted mobile mechanics for brake system service and fluid analysis.
This spring, start your travel season with confidence. Let professionals who understand your RV ensure it’s ready.
About the Author
David Faustina
Founder & Certified Ceramic Coating Installer
David Faustina is a professionally trained and certified detailer specializing in paint correction, ceramic coating installation, and RV detailing. As founder of Eagle Star Detail, he personally works on every vehicle to ensure premium results and customer satisfaction.
Ready to experience professional detailing?
Eagle Star Detail specializes in professional mobile detailing throughout Boise and the Treasure Valley.